Persimmon Pear Fall Salad

IMG_0069

On the eve of Thanksgiving, I’m sitting down to share this salad recipe with you before the madness of cooking Thanksgiving dinner ensues.  I finally learned a few years ago to start cooking for Thanksgiving a day early.  That made me so much more relaxed and (I’ll be honest) just nicer to be around on the actual holiday. You’d be cranky too if you had to make 8 side dishes in one day all by yourself!

With that said, if you have been tasked with being the person to bring a salad to your Thanksgiving potluck and you want to really impress your family and friends, well, I have the perfect salad for you!  It has all the quintessential fall flavors that you didn’t know you wanted in a salad, at least I didn’t.

photo

It all started because I have a persimmon tree in my backyard.  We had quite a large harvest this year and I was trying to find all kinds of ways to eat this fruit.  Come to find out, not many people know what a persimmon even tastes like.  The kind that I have is called a Fuyu Persimmon.  It has a firm but creamy bite with notes of cinnamon and clove.  It is a warm sweet spice.  I don’t think I’m doing it justice, but you must give it a try.

IMG_0075

This bowl I’m using is my “go-to” salad bowl for serving lots of people.  It is very wide, but a bit shallow.  I like it because I am able to layer my greens and toppings.  I actually have 4 layers in this salad.  The bottom is mixed greens, then the fruit, nut, cheese layer and another layer of greens and fruit, nut, cheese on top.  This way, every salad tong full will get an even amount of the tasty ingredients.  Genius huh?

This fall salad has all the flavors and textures you want in a good salad.  The greens are a little bitter. The pear is cold, sweet and crisp. The persimmon is creamy and sweet.  The sliced almonds are nutty and crunchy. The crumbled feta is nice and salty. What more can you want?

Well, you’d want salad dressing, of course!

IMG_0006

This is the maple balsamic dressing that ties this whole salad together.  It is super easy to make and I bet you have all the ingredients in your home already.  I suggest that you make this dressing in a mason jar or one of these lovely dressing bottles. It’s called the Pampered Chef Measure Mix Pour.  I swear I’m not getting any money by mentioning this product, I just love it that much.  It has a mixing whisk attachment that you want to emulsify the ingredients, because over time when the dressing sits, the olive oil will separate.  I just set the bottle by my salad bowl and each person poured on what they wanted.  I can’t believe that 6 simple ingredients can be so tasty! You can’t go wrong with maple syrup, balsamic vinegar, Dijon mustard and olive oil.

I hope this beautiful salad makes it to your Thanksgiving table. It not only tastes amazing, it’s beautiful too.  Happy Thanksgiving, friends!


Persimmon Pear Fall Salad

Salad:

4 small or 2 medium persimmons, peeled and sliced thin

1 brown pear, sliced thin

½ cup sliced almonds, toasted

½ cup feta cheese, crumbled

16 oz. baby spring mix salad greens


Dressing:

1 tsp. Dijon mustard

2 tsp. balsamic vinegar

¼ cup extra-virgin olive oil

2 tsp. maple syrup

Kosher salt

Fresh ground black pepper


In your salad bowl, put down a first layer of salad greens.  On top of that, arrange the fruit, almonds and feta cheese.  Finish with another layer of greens, then fruit, almonds and feta again.

For the dressing, combine all the ingredients in a mason jar or dressing bottle and shake until emulsified.


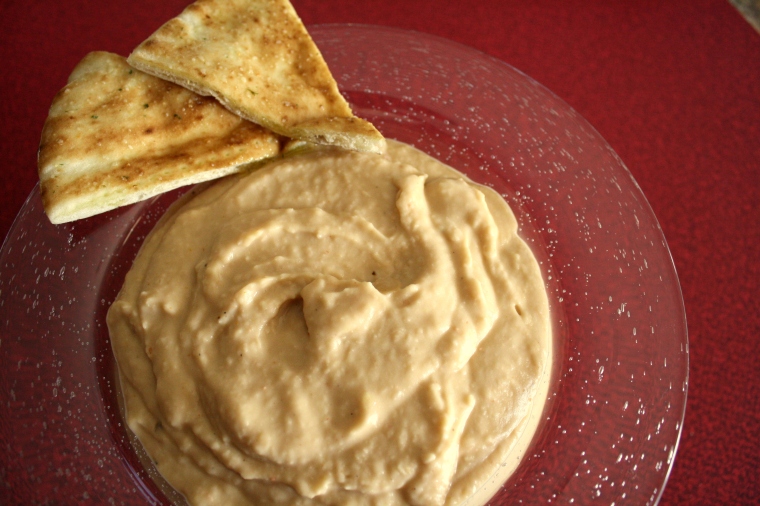
Spicy White Bean Dip

whitebeandip4

One pantry item that I almost always have on hand is canned beans.  Whether it’s white, garbanzo, pinto or black.  Beans are always great to have on hand to make a dip or add into a dish as a healthy protein.

For this dip, I’ve used white beans.  I decided to make this dip a bit smoother, almost like a hummus.  You can certainly keep it chunkier if you like.  Just process it a little less.


whitebeandip1

Throw a can of white beans into your food processor or blender with olive oil and garlic.


whitebeandip2

Now add in the fun seasonings like curry powder and Sriracha hot sauce for extra flavor.  If you like it extra spicy, you can add in another tablespoon of hot sauce.  I stayed with one tablespoon of Sriracha because of my kids.  You know how they can be!

If you notice the dip is too thick, you can stream in some water until you get the consistency you like.


Spicy White Bean Dip

1 15oz can of white beans (rinsed and drained)

1 Tbsp olive oil

1 Tbsp Sriracha hot sauce

1 large clove of garlic

½ tsp curry powder

1 Tbsp lemon juice

1 tsp salt

½ tsp pepper

Pita chips


In a food processor, combine all the ingredients. Blend until smooth.
Serve with pita chips or your favorite crackers.

Green Chicken Ciabatta Sandwich

chickavocadosandwich09

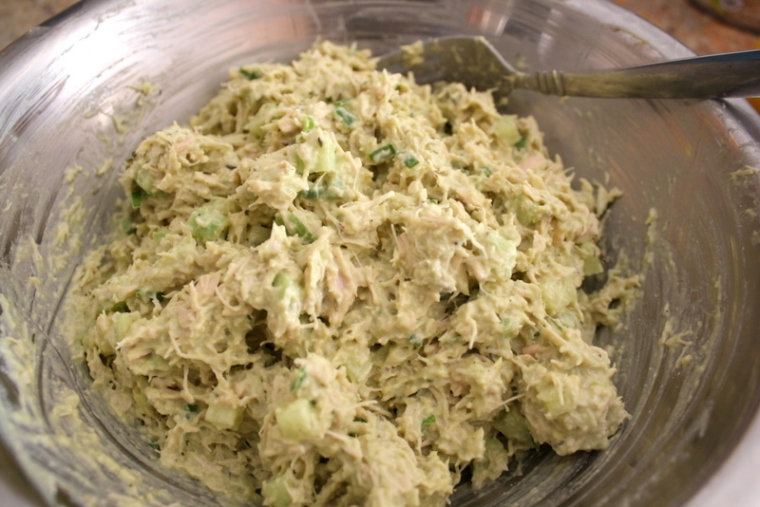
I call this a GREEN chicken sandwich because all the other ingredients besides the chicken are green in color: avocado, green onion, cucumber, and spinach.

I made this sandwich for a light lunch with friends.  It was a little fancier than deli meat and cheese, but not too difficult for a quick lunch.  It’s also great as a make ahead.


chickavocadosandwich01

Start with two cans of chicken breast.


chickavocadosandwich02

Mix in mayo, mustard, juice from half a lemon and salt and pepper.


chickavocadosandwich03

Add in half an avocado, diced up in the skin.  You can then easily scoop this out with a spoon into the bowl.


chickavocadosandwich04

Dice two green onions for a little kick.


chickavocadosandwich05

Peel and dice up half a cucumber for crunch.


chickavocadosandwich06

If you want a carb-free option, this would be great in a leaf of romaine lettuce too!


chickavocadosandwich07

Toast and slice the ciabatta and lay down a bed of baby spinach.


chickavocadosandwich08

Spoon on some of the chicken salad and enjoy an easy but fancy chicken salad sandwich.


Green Chicken Ciabatta Sandwich

2 (13 oz) cans chicken breast

2 Tbsp mayonnaise

1 Tbsp Dijon mustard

½ tsp salt

¼ tsp cracked pepper

Juice of half a lemon

Half an avocado, diced

2 green onions, diced

Half a cucumber, diced

1 cup spinach


Drain the chicken and place into a medium sized bowl.  Mix in all the remaining ingredients except for the spinach.  Toast and slice the ciabatta bun and layer pieces of spinach on one side.  Top with chicken mixture and the other slice of bun.  Slice on the diagonal.  Make 4 sandwiches.

Kale Chips

kalechips4

Okay, I’m jumping on the kale bandwagon too!  I know I’m a little late, but I was so happily surprised by how well these chips came out, I had to post about it.


kalechips1

Besides being a superfood filled with nutrients, this is also very easy to make.  Just 4 easy steps!  Start with washing and cutting the kale into bite-sized pieces.  Make sure to dry thoroughly as well.


kalechips2

Spread out the leaves on a large sheet pan, with no overlapping pieces.  Drizzle it with olive oil and sprinkle with salt and pepper.


kalechips3

Once thoroughly coated, lay flat and throw it in the oven.


kalechips4

The oven does all the work.  Here are your crunchy, flaky chips that are also good for you.  Doesn’t get any better than that!


Kale Chips

1 bunch kale

1 tablespoon olive oil

1 tsp kosher salt

¼ tsp fresh cracked pepper


Preheat oven to 350 degrees.

Tear the kale leaves from the thick stems, then tear into bite size pieces. Wash and thoroughly dry kale with a salad spinner and lay flat on a large cookie sheet. Drizzle kale with olive oil and sprinkle with salt and pepper.

Bake until the edges are brown, but not burnt, 10 to 15 minutes.

Greek 3-Layered Dip

007

I found this gem of an appetizer at a women’s function at my church recently.  When there is a potluck going on and you see a small huddle of women gushing and pointing at one particular dish, you know it’s gotta be good!  Well, I wasn’t surprised to find that I was right.  It was this savory and rich dip that we all could not get enough of.  Literally, there were only little bits of scrapings left by the time I got over to the dish.  I had to make it for myself to satisfy my taste buds’ craving for the flavor.


002

In short, it starts with a layer of hummus


003

then a layer of tzatziki sauce


006

and lastly, this Greek salad to top it off with even more flavor and color.  I made this salad and let it sit in the fridge for about 30 minutes and then strained off the liquid that comes out of the tomato and cucumbers.


009

The completed dip is just Greek heaven to my taste buds!  The hummus is creamy rich and the tzatziki sauce with Greek yogurt, cucumbers and dill give a great cooling tang to your tongue. However, it’s the salad on top that makes the whole dip.  It has grape tomatoes, cucumbers, kalamata olives and fresh parsley. Altogether, it just makes for a fresh and healthy snack.


010

I served the dip with store-bought pita chips and also soft pita bread cut into triangles.  I brought this dish to a Christmas party this week and the red and green colors added to the festive colors of the holidays. It was a hit!


Hummus
Here is my link to my basic hummus recipe:  https://kareninthekitchen.wordpress.com/2011/11/15/hummus-three-ways/

Tzatziki Sauce
From Brown Eyed Baker

1 medium cucumber, peeled, seeds removed and cut into large chunks
1½ teaspoons kosher salt (for draining cucumber)
1½ cups plain Greek yogurt
1 small clove garlic, grated
4½ teaspoons lemon juice
1½ teaspoons chopped fresh dill

Place the cucumber in a colander in the sink and sprinkle with the kosher salt. Let sit and drain for 30 minutes. Dry thoroughly with paper towels, then chop very finely. Combine the finely chopped cucumber with the yogurt, garlic, lemon juice and dill.

Tomato Cucumber Salad

10.5 oz pkg grape tomatoes, cut into quarters

1 cucumber, peeled, deseeded, chopped

1/4 cup kalamata olives, chopped

1/4 cup parsley, chopped

1/2 lemon, juiced

2 tbsp olive oil

salt and pepper

Toss all ingredients into a bowl and refrigerate for 30 minutes.  Pour the salad into a colander and drain out the liquid and serve.

2-in-1 Lasagna and Eggplant Parmigiana

eggplantlasagna24

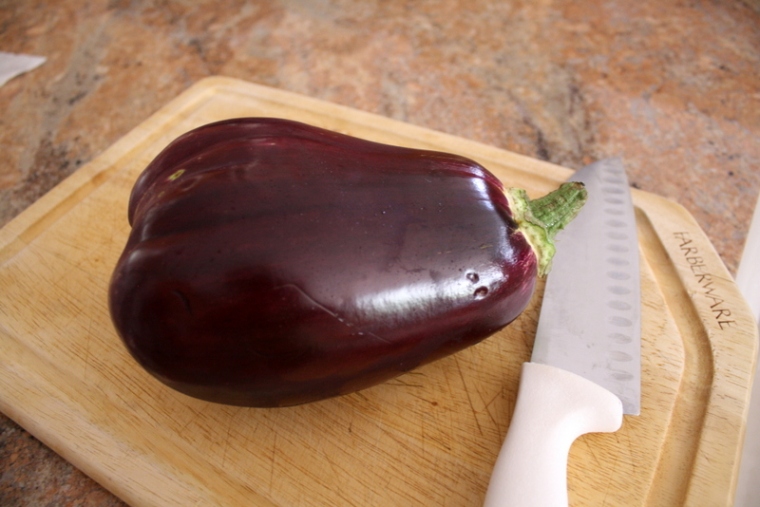
This meal was partly born out of the beautiful eggplant that I bought from a local vegetable farm. Knowing that my children would never go near the eggplant, I had the idea to make a portion of the dish into a traditional lasagna.  It was a perfect pairing because I used the exact same filling ingredients for both sides of this combo dish.

eggplantlasagna01

I just love the color of eggplant, don’t you?  Did you know the color and vegetable is technically called aubergine?  I just love saying that word.  Try it with me…….”oh-ber-zheen.”

eggplantlasagna02Get it all sliced up into about 1/4 inch slices.

eggplantlasagna03I then put it through a 3-step breading process.  Flour first, then egg wash and lastly, Italian breadcrumbs.

eggplantlasagna04Here is my favorite kitchen helper.  My daughter has to stand on a stool to make it all work.  Love it!

eggplantlasagna07My favorite part of the eggplant parmigiana is that I bake it, not fry it with oil.  I feel like I taste the flavor of the eggplant more and without all the fat and calories of the oil.

eggplantlasagna08Make a slit down each Italian sausage and remove it from the casing.

eggplantlasagna09I then crumble it into a pan and brown it until cooked through.

eggplantlasagna10I used a whole bag of fresh spinach.  It looks like a lot, but it will wilt and shrink before your eyes.

eggplantlasagna11Here it is cooking in hot water……

eggplantlasagna12Here is the spinach after cooking.  It’s amazing how it cooks down like that.

eggplantlasagna13While you let your spinach cool enough to touch, boil up your lasagna noodles.

eggplantlasagna14This is really the amount of spinach that came out of that whole colander.  I don’t know why, but it surprises me every time!!  Still!

eggplantlasagna15Give it a good chop.

If you don’t want to go through the trouble of using fresh spinach, feel free to use a package of frozen spinach.  It works just as well.

eggplantlasagna16Add it to the ricotta, egg, and spices.

eggplantlasagna18Get it all mixed thoroughly.

eggplantlasagna17Here’s the lovely browned eggplant, out of the oven.

eggplantlasagna19Put down a layer of your favorite pasta sauce.

eggplantlasagna20Here’s my assembly line, all set up and ready to put together.

eggplantlasagna21I used the largest glass pan I own.  You can tell about 1/3 was eggplant and 2/3 was pasta.

eggplantlasagna22It’s easiest to spread the ricotta mixture first, then the sausage, then mozzarella and sauce on last.

eggplantlasagna23Continue with the layers until you’re all done.  The top layer has more sauce and cheese.

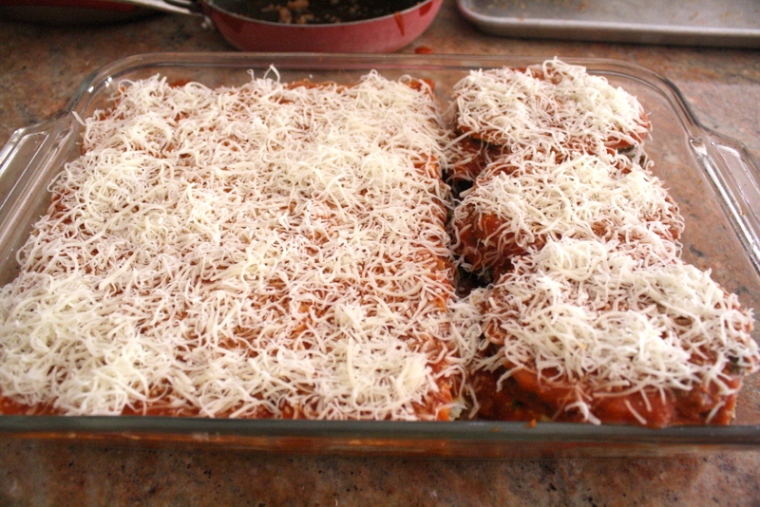
eggplantlasagna24Bake it until your kitchen smells like your Italian grandmother’s house.  If you don’t have an Italian grandmother, just pretend.  That’s what I did!

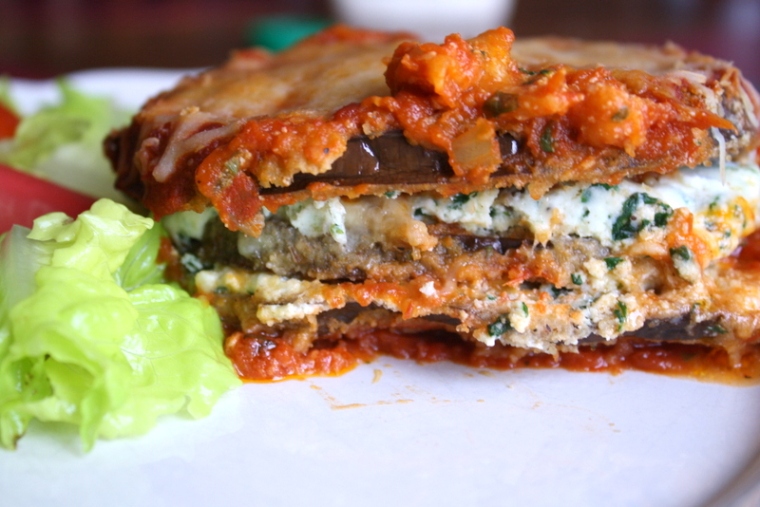
eggplantlasagna25Here’s a side shot of the eggplant……I mean aubergine parmigiana!! Delectable, I promise.

Warning: If you eat this right away, make sure you blow on it for a bit or you’re likely to burn the roof of your mouth.  I speak from personal experience.  But, it was kinda worth it!

2-in-1 Lasagna and Eggplant Parmigiana

1 medium size eggplant, ¼ inch slices

12 lasagna noodles, cooked al dente

3 cups Italian bread crumbs

4 eggs

2 tablespoons water

2 cups flour

5 links sweet Italian sausage, crumbled and cooked

1 bunch spinach, blanched chopped

16 oz ricotta cheese

½ cup parmesan cheese

Pinch nutmeg

2 cups mozzarella cheese

1 jar pasta sauce

½ tsp salt

¼ tsp pepper

After your eggplant is sliced, cover each piece first in flour, then 2 eggs that have been scrambled with water and lastly the bread crumbs.  Lay each slice of eggplant on a baking sheet and bake at 350 for 20 minutes or until golden brown.  Set aside.

For your lasagna filling, combine the ricotta cheese, the other 2 eggs, spinach, parmesan, nutmeg, salt and pepper.  Set aside.

To assemble this dish, use an 11×14 inch pan or your largest baking dish.  Start by pouring enough pasta sauce to cover the bottom of the dish.  Lay noodles down on one side and the baked eggplant on the other.  Spread on a layer of ricotta mixture, then sausage and mozzarella cheese.  Lightly spoon on and spread enough pasta sauce to cover each layer.  Continue each layer until you run out of ingredients.  For me this was 4 layers of pasta/eggplant and 3 layers of cheese/sausage.

The top layer is pasta and mozzarella cheese only.  Bake this at 350 degrees for 30 minutes, until cheese is bubbly and golden brown.

Homemade Lemonade Concentrate = Perfect Lemonade

lemonade2

If you have a mature lemon tree in your yard like my parents do, then I bet you’ve got lemons coming out of your ears.  My parents were nice enough to share their abundance of lemons with me.

As the cliche goes, the best thing to do when you have lemons really is to make lemonade!  And this is the recipe you want to use.

lemonade3

Start with a quart mason jar and add in the zest of one lemon.

lemonade4

Juice the lemons until you get one and a half cups of pure lemon goodness.

lemonade5

One tip for your electric juicer is to place a grippy sheet thingy under it so it doesn’t run around all over your kitchen counter tops.  No one wants a crazy juicer running around, ya know!

lemonade6

Next, add the juice to the zest in the jar.

Marvel at how the cute little bits of zest swim around in that lovely juice.

lemonade7

Add your sugar to a small pot.

lemonade8


Then add the water and place it on medium heat until all the sugar is dissolved.  Good job, you’ve just make simple syrup!


lemonade9

Add the simple syrup to the jar and allow it to steep until all the flavors combine and cool down.  It’s ready to use once it’s cooled.

To make lemonade from this concentrate, combine 1 cup of concentrate to 3 cups of cold water into a pitcher.  Then, pour over a glass of ice and enjoy the fruits of your labor………literally!!

Also, because this concentrate looks so lovely and fits so nicely into a mason jar, it also makes a great gift!


Homemade Lemonade Concentrate

1 ½ cups sugar

1 ½ cups water

Zest from one lemon

1 ½ cups fresh lemon juice


Measure the sugar and water into a sauce pan. While stirring with a wooden spoon, bring the mixture to a boil until all the sugar is dissolved. Remove the saucepan from the heat. Let cool slightly.

Add fresh squeezed lemon juice and lemon zest to the sugar syrup.  Allow it to cool. Pour the lemonade syrup into a quart jar. Cover tightly with the lid. The syrup can be kept in the refrigerator for 2 or 3 weeks.

Turkey Lettuce Cups

turkeylettucewrap11


These lettuce cups are an explosion of flavor and texture.  You get an amazing crunch from the lettuce and water chestnuts and then the sweet and spicy from the sauces.  It’s also a beautiful looking dish, with splashes of color from the green onions and red peppers.


turkeylettucewrap02


Start by browning the ground turkey with some garlic.

turkeylettucewrap03


Have all your other filling ingredients chopped and ready to go.  Here I have cremini mushrooms, red bell pepper, green onion and water chestnuts.  Chop them all finely and set aside.

turkeylettucewrap04


Add everything in except the green onions and saute until softened.

turkeylettucewrap05


Shaohsing cooking wine is a staple in a Chinese pantry.  But if you’re not Chinese, or just don’t have any, you can substitute with sherry wine.

turkeylettucewrap06


Hoisin sauce is another common flavoring item in Chinese cooking.  It is sort of like a sweet bbq sauce, but deeper in flavor.  This is very common in grocery stores now, so I’m sure you can find it in the Asian aisle at the store.

turkeylettucewrap07


If you don’t know what Sriracha sauce is, it’s a very tasty and spicy chili sauce.  This can also be found easily at your local grocery store, probably close to the hoisin.

turkeylettucewrap08


After adding in all the sauces, throw in the green onions.  I put the onions in last because I don’t want them to wilt down and lose its color or texture.  Add in the Chinese five spice, salt and white pepper to taste.

turkeylettucewrap09


Here is the beautifully cooked turkey filling, ready to plopped on top of a leaf of iceberg lettuce.

turkeylettucewrap10


Iceberg lettuce is really the best type to use for this dish.  It is firm and holds its shape well.  It also has the best crunch and is conveniently shaped like a bowl.  This is an ideal dish for  a low carb diet, but tasty enough that you won’t miss the carb at all!!


Turkey Lettuce Cups

Yield:  10 servings

1 ½ pounds ground turkey

2 cups fresh cremini mushrooms, diced

2 tablespoons canola oil

3 cloves garlic, diced

1 red bell pepper, diced

1 small tin (6 to 8 oz) sliced water chestnuts, diced

3 green onions, diced

3 tablespoons Shaosing Chinese cooking wine

3 tablespoons hoisin sauce

1 tablespoon Sriracha chile sauce

Kosher salt and white pepper

½ teaspoon Chinese five spice

1/2 large head iceberg lettuce, core removed, head quartered


Remove tough stems from mushrooms and brush with damp towel to clean, dice mushrooms.

Preheat a large skillet or wok to high.

Add oil to hot pan.  Add ground turkey to the pan and saute the meat by stir frying a minute or 2. Add garlic and cook another minute or two. Add in the Chinese five spice and salt and pepper to taste. Cook a minute more. Add bell pepper and chopped water chestnuts. Cook another minute, continuing to stir fry mixture. Add cooking wine, hoisin, sriracha and toss to coat the mixture evenly.  Add the green onions at the end to retain color and freshness.

Transfer the hot turkey mixture to serving platter and pile the quartered wedges of crisp iceberg lettuce along side. To eat, pile spoonfuls into a lettuce cup, wrapping lettuce around the filling and enjoy!

Baked Chicken Chimichanga

chimichanga11

The chimichanga by definition is a deep-fried burrito.  Since I’ve been trying to feed my family healthier foods, I’ve never dared tried making a chimichange myself.  But, when I came across this recipe for a baked chimi, I had to try it!  I completely did not miss the deep frying part.

chimichanga01

Start with mixing together cream cheese and taco seasoning.

chimichanga02

Stir in the Mexican four cheese blend.

chimichanga03

Here is my secret weapon for the quick weeknight meal………..store-bought rotissiere chicken!  Finally, the secret’s out!

Thank you to the genius who knows that moms can use some help every now and again and invented the precooked rotissiere chicken.

chimichanga04

Shred up the two breasts.

chimichanga05

Spread a generous layer of the cheese blend onto a flour tortilla.

chimichanga06

Layer on some chicken.

chimichanga07

Tuck and fold tightly so nothing leaks out.

chimichanga08

What a cute little bundle of joy…………I mean, deliciousness!

chimichanga09

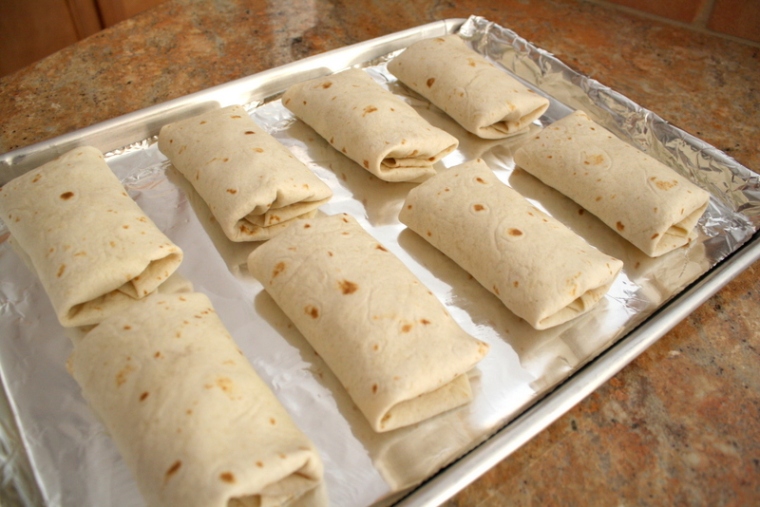
Lay the eight chimis seam side down on a baking dish.

chimichanga10

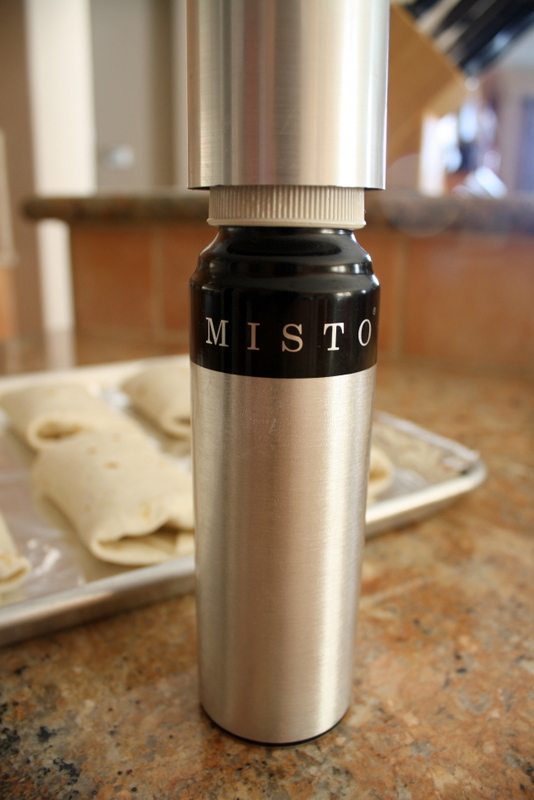
Then spray them with some vegetable oil spray.  I love my Misto, I can put any kind of oil in there and just pump and spray away!  It’s a very handy kitchen gadget and one of my favorites.

chimichanga12

I love that the chimichanga does get a nice brown crunchy texture on the outside.  Then when you bite into it, you get the creamy chicken with all that savory taco seasoning, delectable I tell ya’!!

I topped my chimi with sour cream, homemade salsa, shredded cheese and some green onions.  Here’s the recipe for the amazing restaurant style homemade salsa.

I know it’s good when my hubby keeps saying how good it is after each bite.  He did that about 4 times tonight.  This recipe is a keeper!

Baked Chicken Chimichanga

From Menu Managed

8 oz. package cream cheese
1 cup Mexican Blend cheese, shredded
1 taco seasoning packet
1 lb. store-bought  rotissiere chicken, shredded
8 flour tortillas
cooking spray
shredded cheese
green onions, for garnish
sour cream
salsa

Stir together cream cheese, Mexican blend cheese and taco seasoning.  Spread cheese mixture on a flour tortilla, then lay some shredded chicken on top.

Tuck in sides, and roll up each tortilla.  Lay seam side down on a baking pan lined with foil.
Spray tops of tortillas with cooking spray.
Bake at 350 degrees for 15 minutes.  Turn chimichangas over, and bake an additional 15 minutes.

Serve with cheddar cheese, green onions, sour cream, and salsa.

Beet Greens with Bacon

beetgreens1

My last post showed how I roasted beets, now this post deals with the other half; the beet greens.  These greens are  probably the most beautiful greens because of the red veins running through each leaf.  Aren’t they pretty?

beetgreens2

If you have any reservations about eating beet greens, let me just say that bacon is involved!  Does that make it better?  Oh, and garlic takes it over the top.

Notice that I cut my bacon across the slices, right out of the package.  It’s a quick and easy way to cut bacon into even pieces.  Each cut comes out to about one slice of bacon.

beetgreens3

Start by sauteing the bacon until some fat is rendered and the bacon is crispy.  Then add in the chopped garlic.  After I took this picture, I added garlic chile sauce, cider vinegar, water and sugar.

beetgreens4

Add in the cleaned and chopped beet greens.  Saute with a spatula until the greens are wilted and tender.  Add salt to taste.

Sorry this shot is a little blurry.  I was so overcome with excitement over the smell that I couldn’t hold the camera still!

beetgreens5

The beet greens tasted more amazing than I expected.  The slight bitterness paired with the smokey bacon and robust garlic is a perfect mouthful!  This would make a great side dish to any beef or chicken entree.

Sauted Beet Greens with Bacon

1 pound beet greens

3 strips bacon, chopped (or a tablespoon of bacon fat)

1 large garlic clove, minced

3/4 cup of water

1 Tbsp granulated sugar

1 teaspoon garlic chile sauce

1/6 cup of cider vinegar

salt

Wash the greens in a sink filled with cold water. Drain greens and wash a second time. Drain greens and cut away any heavy stems. Cut leaves into bite-sized pieces. Set aside.

In a large skillet or 3-qt saucepan, cook bacon until lightly browned on medium heat (or heat 1 Tbsp of bacon fat). Stir in garlic. Add water in a gentle stream to the hot pan, stirring to loosen any particles from bottom of pan. Stir in sugar and garlic chile sauce. Bring mixture to a boil.

Add the beet greens and gently toss in the garlic mixture so the greens are well coated. Reduce heat to low, cover and simmer for      5-10 minutes until the greens are tender. Stir in vinegar. Add salt to taste